Ahoy, mateys! In the treacherous, ever-shifting waters of the Sea of Thieves, a new chapter of swashbuckling drama unfolded back in 2026. The beloved bard, Merrick, found himself in a right pickle, snatched away by the shadowy Dark Brethren and held captive in their gloomy fortress. This set the stage for 'A Hunter's Cry', a time-limited Adventure that had pirates scrambling to mount a daring rescue. This wasn't just another stroll on a sandy beach; it was a full-blown assault on a damned stronghold, a thrilling mix of puzzle-solving, ghost-bashing, and the ever-present chance of getting a cutlass in the back from a fellow 'friendly' player. Talk about a stressful vacation!

The mission begins not with a bang, but with a chat. To kick things off, pirates need to have a word with Larinna, who's always loitering outside the tavern. She's the gateway to all this spectral excitement. Choosing 'Begin Adventure' summons none other than the Pirate Lord himself onto the dock. After a brief pep talk (or perhaps a stern warning about the ticking clock), he waves his hand and—poof—a glowing portal rips open in the sea. But before you sail headlong into the green abyss, a word to the wise: stock up! Fill your barrels with bananas for healing and wooden planks for the inevitable holes in your ship. You'll need them, trust me. The Sea of the Damned is not known for its hospitality.
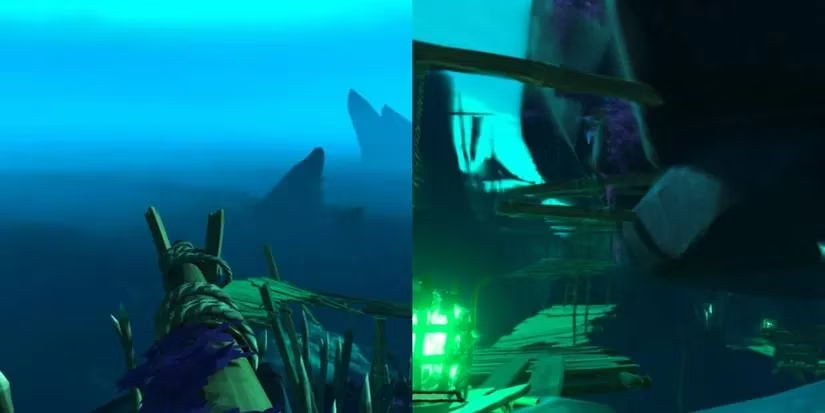
Sailing through the portal is like entering a haunted postcard. The world shifts to eerie green and murky blues, and the ghostly voice of the Warsmith echoes around you. The target? A massive, spooky fortress jutting out from a central rock arch—the Damned Sea Dog's Tavern. And it's surrounded by three ominous lighthouses. Now, here's the first trick: you can park your ship anywhere, but the southern dock is like the VIP parking lot—nice and spacious. The lighthouses stand guard to the north, south, and east, and they hold the key to progressing.

The core gameplay loop here is all about flames and beacons. First, grab a Green Flame of Souls from a lit brazier on the dock. This spooky light in your lantern is your universal key. Approach any lighthouse, and you'll see a green force field blocking the door. Light the two small braziers flanking the entrance with your flame, and whoosh—the barrier vanishes. Inside, keep your eyes peeled; sometimes there's a little stash of gold waiting at the bottom of the stairs. A nice little 'finders keepers' bonus, if another pirate hasn't beaten you to it!
Climb to the top, and you'll find the lighthouse mechanism. Light it up, and then you need to play a game of alignment. Look for green torch beacons in the distance and rotate the lighthouse until its beam hits one. Click. One beacon lit! This triggers another one to appear elsewhere. To get around this rocky archipelago quickly, use the cannons scattered on the docks—they're like pirate-powered catapults—or the many ladders. This is also a brilliant way to give other, less-friendly players the slip. You need to light at least two beacons. Do that, and a ghostly jetty will materialize at the base of the central tavern. Fancy, huh?

Now the real fun begins. Head up that newly-appeared jetty. Your job is to light five small braziers along the stairs and around the tavern entrance. Of course, the Dark Brethren haven't just left their lights on for you; their phantoms will be there to 'greet' you. You can fight them or, if you're feeling nimble, just sprint past. Once all the little fires are lit and the main beacons are glowing, the green aura around a capstan near the tavern door will fade. Give that capstan a few hearty turns, and a giant gate will creak open.
Inside, a tunnel leads you under the central arch. Light the brazier there, and you'll see a new, large beacon in the distance. This one requires the Northern lighthouse to activate. Once you've sorted that (maybe via a quick cannon shot back to the north dock), return to the tunnel. A spectral bridge will have formed at the top. Walking across it is... an experience. It's hazy, it's precarious, and there's one big jump that has sent many a pirate plunging into the drink. Just take it slow and steady.

On the other side, you'll find a fallen mast with nasty-looking spikes below it. Light the brazier here, and another large beacon appears to the right. This one needs the Eastern lighthouse. After lighting it, you can use the shipwreck at the base of the mast as a stepping stone. Carefully walk across the mast itself onto another ghostly walkway that leads you back to the central arch, but now you're on the opposite side.
Here, by a lonely cannon, is another brazier. Light it, and guess what? Yep, another beacon. This final one can be lit using either the Southern or Eastern lighthouse. Pro tip: sword-dashing across the water here is much faster than swimming. Once it's lit, climb back to the cannon. The final piece of the puzzle appears: a wobbly, ghostly wooden platform that spirals around to the last capstan. If you fall, don't panic—there's a handy mast to climb back up. Turn that final capstan, and with a great rumble, the drawbridge lowers. Victory (and Merrick) is in sight!
But the clock is ticking! The whole shebang needs to be wrapped up in about one hour. If you dilly-dally too long, the Pirate Lord loses his patience, ends the Adventure, and you're back to square one with Larinna. No pressure!
Finally, you reach Merrick. The poor guy is surrounded by the ominous silhouettes of the Dark Brethren. A quick chat with him completes the rescue, prompting the Pirate Lord to appear and scare off the baddies. After a brief cinematic, you're magically zapped back to your ship. The Pirate Lord gives you your next orders: report back to Larinna at an Outpost.
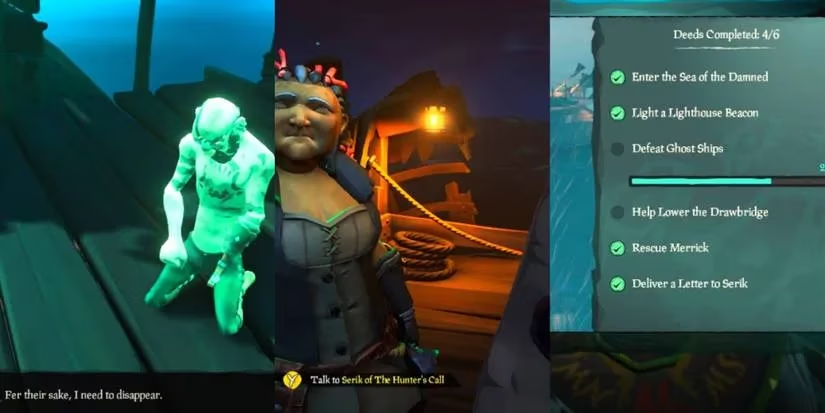
Talking to Larinna starts the sweet, final chapter. She gives you a letter from Merrick to deliver to his wife, Serik, at the North Star Seapost. It's a touching conclusion to the chaotic rescue. Your rewards for all this effort?
-
The Hunter's Repose Memento: A fancy painting you can show off as a trinket on your ship's wall.
-
The Defender of the Damned Memento: An even fancier trophy, earned only by completing all the optional Adventure Deeds.
So, there you have it. A step-by-step guide to storming a ghostly fortress, outsmarting puzzles, outrunning phantoms, and maybe outmaneuvering a rival crew or two—all in the name of saving a friend. It's the kind of chaotic, memorable tale that makes you sit back after it's all over, take a long sip of grog, and say, 'Well, that was a thing.' Just remember: in the Sea of Thieves, sometimes the greatest treasure isn't gold, but the wild story you get to tell afterward.